Showing posts with label Crafts. Show all posts

Monday, March 18, 2013

Home Rules

Back at the beginning of the year I set 6 craft goals for myself.  The end of February is approaching fast it took me until March to finish this post, I needed to tackle at least one on my list.  I really had done most of the work over the past few weeks, but just needed to pull all the parts together.  I knew when I saw a piece of plywood in the garage that it would be perfect for an update to our Home Rules.  And yes, we do have random pieces of wood in our garage, along with plumbing parts and enough electric wire for several houses.  I love my handyman tinkering husband!  I had him cut the wood down to 16.5” wide.  The board was already 36” long so I had to work with that for the space and that seemed big enough for what I wanted.  Plus free wood is hard to pass up.  The wood didn’t need much else done to it after Chris cut it besides a quick sanding of the edges.  I hate to touch sandpaper and fell in love when I found this fun tool.  Add it to your must list if you have a project that involves sanding by hand.

IMG_3850 IMG_3851

We sat down as a family in early January and came up with our own version of our Home Rules. We used the Home Rules that my mother-in-law gave us 10 years ago(when we bought our house) as a starting place and then changed them to fit who we are as a family now. Plus we added a few more. I love how much Taylor wanted to help with this even if her rules were closer to 10-15 words long. It was hard to explain to her to make them simpler but I loved her enthusiasm.  Lizzie even made sure we included “Love Your Guts”.  Chris’ cousin taught the girls this saying because she never understood why kids would say “hate your guts”.  It seemed so mean and she loved her friends, so she started “Love Your Guts” as a way to show love instead of hurt. 

Then I used the Silhouette Studio to create the vinyl for my board.  I love the ease of using this program.  If only I didn’t have so many fonts to choose from that made it so hard to narrow down.  I wanted to try to use a different font for each rule, but loved a few so I reused them.  Plus by the time I got down to the last few they all started to look the same.  Since I needed the vinyl 16” wide and my machine will only cut to 12” wide I had to break it into three 12”x16” pieces.  Here is what my screen looked like so you can get an idea. 

image

In case you want to use any of the fonts I have here they are in order from top to bottom: a red bucket, elephants in cherry trees, Digs My Heart, Folio, font moochers, Malihini, Grilled Cheese, Howser, Missed Your Exit, Sproket BT, Mister Sirloin, oh {Photo} Shoot, My Own Topher, cinnamon cake, wish I were taller, Digs My Heart, Clingy, Hiccups, Mr & Mrs Popsicle, and Boring Showers.

Then I stalled a few more weeks on this project trying to pick a color to paint it.  This will hang in an area that is part breakfast table area part living room.  I have lots of red in our house now, but plan on redecorating the kitchen soon and I’m still now sure what colors I will use.  I debated between red, chocolate brown, dark blue, or light brown.  Red won out over all the other colors since Chris reminded me that if we ever get rid of reds then I can make a new one.  Plus we might try to update this every 5 years as the girls grow and are able help us more.

IMG_3852

Even though the paint is truly dry after an hour or so, I let it ‘air out’ in the garage for a few days.  The vinyl is already super sticky so I wanted to make sure the board didn’t add to the challenge.  (Too bad the vinyl decided it didn’t want to stick to painted plywood and still made for a challenge!)  I lined my three pieces of lettering up on the board like I wanted.  I wish I would have paid more attention to how much space was between each section better because there is almost too much space between ‘love your guts and laugh + giggle + be silly’.  You probably didn’t notice it until I pointed it out so it’s not a huge deal but I tend to be OCD like that.  Part of me is still considering pulling those two lines off and redoing them.  Like I said before, the vinyl didn’t play nice and I ended up having to do almost each letter one at a time. 

IMG_3858 IMG_3859

But all that work was so worth it because I LOVE how it turned out!  The red looks awesome and is a great pop of color on that wall.  I love seeing it as I come down the stairs and often find myself using these phrases for kid lessons to reinforce what we created as a family. 

IMG_9139

So now that you’ve seen our family rules, what would some of yours be? 

Friday, January 11, 2013

2013 Goals

I know we are already 11 days into the new year, but I always like to make some kind of goals for myself each year.  Maybe if I post them on here I will actually follow through with a few.  I know most people do the normal lose weight, eat healthier, exercise more and so on.  I like these and will try a few but I think my personal goals this year are to complete some craft projects.

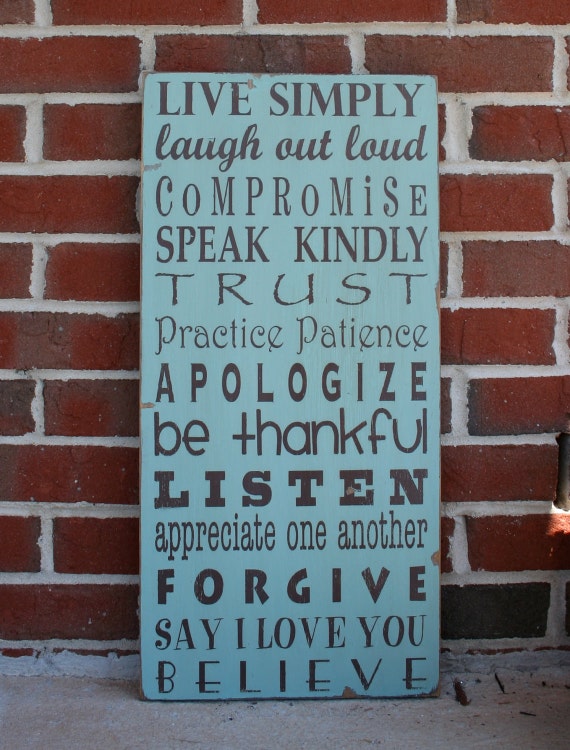
1.  Home Rules: I love the new trend of subway art home/family rules.  I know it would be easy to just order one from Very Jane or one of the other cute sites, but I want it to be more personal.  So I hope to make our own version.

Family Rules Sign - Live Simply Typography Word Art  Sign

2.  Sew my first quilt: I’ve always wanted a great picnic blanket and immediately fell in love with this fabric.  I bought all the fabric and it is starting to gather dust in my craft room.  Fabric this cute needs to be sewn and preferably in late winter/early spring so it is ready for movie nights in the park, spring soccer games, and maybe a trip to the beach.

3.  Make a digital book of Taylor and Lizzie’s artwork.  I know this isn’t technically sewing or crafting, but 2.5 years of preschool artwork is taking up some serious space under my craft room table.  I need to get a handle on this before Taylor starts elementary next year and the paperwork doubles.  Have you done this and had any success? 

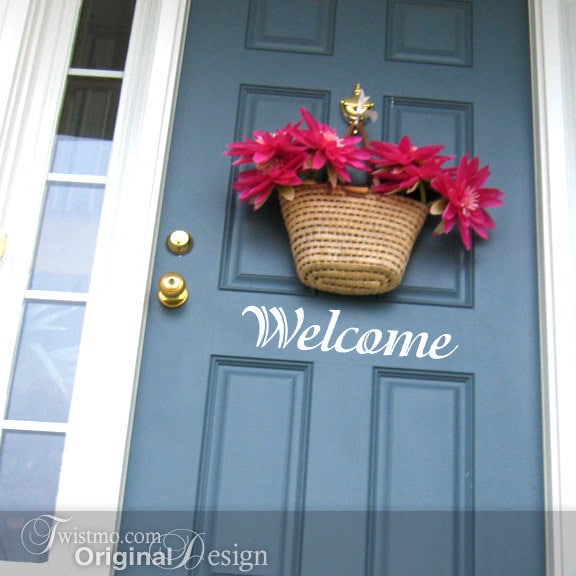
4.  Paint our front door and add vinyl numbering to it.  Our door is just a boring blue, so I think a fun color would dress up our front porch.  Now to figure out what color!

Welcome Sign Door Decal - Vinyl Wall Decal, Front Door Decoration, Door Sticker

5.  Purge from my craft room.  I know this might seem like madness, but I have accumulated too much over the past 10 years in this house and have too much stuff.  So this is my fair warning to my friends that you might get random texts of “Do you want any of this?” during 2013.  Lizzie will soon be needing a spot at the craft table and there’s barely room for me and Taylor. 

6.  Officially write up the two knitting patterns that I created.  This includes bribing friends with little bitty babies to let me use them for photos. 

Six sounds like a good stopping point and gives me at least 2 months to accomplish each goal.  If I can get all these done, then I will add to my list.  Who knows, maybe I’ll even finish more than one craft every four months and actually blog about it.  What are your goals for this year?  Any projects you want to finally complete?

Monday, December 31, 2012

December wrap-up

I was a bad blogger last week.  I indulged in lots of sweets, stayed in pjs all day, let the dishes pile up in the sink, and ate way too much take-out but I built lots of Duplo castles, dressed Minnie Mouse hundreds of times, ate lots of pretend cookies, colored after every meal(and then some), danced my butt off against a 4 year old and two year old on the Xbox, and snuggled up with my little people while watching movies.  Sometimes life is better when you step away from the camera and laptop and just enjoy.  So that’s what I do every so often and hope that my mind will tuck those captured moments away for later on when the kids are too big to want to cuddle anymore. 

But good news Mom(because she is always wanting to see more pics of the girls) I did take some pictures this month and here is a quick wrap-up.

1) Nothing says Merry Christmas like Mr. and Mrs. Santamingo; 2) Christmas list made; 3) Screaming and coloring, check; 4) dress up; 5) crazy poses for Mom; 6) wiggle car used as a scoot toy; 7) Singing in the Christmas preschool program(Taylor is on bottom row, 2nd from right); 8) crazy Elf(aka Snowflake) antics; 9) new color changing star on tree thanks to hubby; 10) more dress up and posing silly; 11)Ikea shopping; 12)Daddy snuggling; 13)sidewalk decorating; 14)new hat creating(I’ll post about this in January); 15)mailbox checking; 16)goodbye party for Elf; 17)car napping; 18) cross dressing Elf tea party; 19)Santa gifts; 20)left pile jumping; 21)fun with bracelets; 22)present opening; 23)new visitors for Baby Jesus; 24)bike riding; 25)spending time with cousins; 26)Elf vs transformers marshmellow war – they really shouldn’t mess with Mommy’s coffee; 27)best road trip kid

2012-002

Hope your December was exciting too!

Friday, December 14, 2012

Homemade gift ideas

Every year I struggle to come up with ideas for parents that have everything and grandparents who need nothing.  When kids came along this got a little easier because grandparents and great grandparents always love pictures of the little ones.  I know I can’t be alone in this search for good gifts so I thought I would share a couple that have worked great for me. 

The first one is a personalized photo calendar.  The first year I did the scrapbooky one and then realized making 5(one for me to keep too) of these was a lot of work and I only had one kid at the time.  I had made a few books on Shutterfly and Picaboo so I decided to try out their calendars.  Shutterfly doesn’t offer the ability to full edit your photo layout and background choices, so Picaboo is the winner for me.  Not everyone is as OCD about this as I am and will probably love the options available at Shutterfly.  I pick out pictures from the month they occurred so we can look back on the girls from the year before.  And every year I tell myself not to wait until the last minute to go through a years worth of photos.  Maybe one of these years I will remember not to do this.  Thank goodness for caffeine and a Duck Dynasty marathon last week!  Yes I watch the show and love it but that sounds like a good post for another day.  Back to calendaring… here is an example of what my pages looked like for 2012.  I can’t show 2013 since they are currently wrapped and won’t be opened by the time this post is viewed.

Screen Captures

Picaboo makes it so easy.  If only it were easy to keep it down less than five photos per page.  More than that gets to be a bit busy and you completely loose the background.  Picaboo is constantly running sales so that you can get them for at least 40% off and potentially free shipping depending on if you have to order 8 like I now do.  You could pull an all nighter too and still have them in time for Christmas if you are still looking for a gift.  Just make sure you have something fun to watch or Facebook pulled up so you can procrastinate every so often.  It’s just more fun that way or maybe it’s just the way I do things.

My other go-to gift for parents/grandparents is an ornament with a picture of the girls.  The first year I did Taylor’s handprint mold thing(official term) as the ornament and have done pictures versions each year since.  Then I did Taylor in this cute snowflake ornament, the next year was a foam photo frame kit(turned into ornament) that Taylor ‘helped’ with, and last year’s was such a fail that it fell apart while hanging on the tree.  I had these incredibly cute ideas of what to do and when I attempted to make them it was a horrible mess.  Plus I had stressed over making them.  As a backup I bought another set of foam frame sets with hopes that Taylor would be able to help again last year since she was getting better at crafts.  It was still way too hard for her and I had to finish this up to only have them fall apart as people unwrapped them.  I promised myself that I would not let this be a stressful gift and have decided to leave ornament making to the pros for a few more years.

IMG_8036 IMG_8035 

Cue Crate & Barrel’s adorable frame(with stand on back for table sitting later) ornament with a few personal touches.  Sshhh… don’t tell anyone these were only $3.95 each.  They had rectangle versions too, but I loved the fun shape of the ornament.  I generally mark the year on the back but thought I would add a personal touch to the front.  I took a picture so you could see my fancy workspace.  Can you tell I share the table with my 4 year old who loves to craft too?  I have to constantly remind her that she cannot take over the entire table. 

IMG_3418 IMG_3421

My Silhouette did a great job of cutting the itty bitty 3/4” tall black vinyl lettering. I peeled off all the negative space, applied contact paper to the front, and then very carefully pulled the backing off.  Make sure you rub the top of the contact paper really good with an old credit card or scraper before peeling the back off.  This will help it stick to the contact paper better.

IMG_3419IMG_3422   

I centered the ornament on my mat so I had a reference for a center on the ornament and then put the numbers on.  I rubbed them again with the scraper to make sure they were stuck down real good and then pulled the contact paper off. 

IMG_3423 IMG_3420 

Luckily I had this adorable photo of the girls from our family photo shoot with Heather that worked perfect.  I actually printed two prints on a 4x6 size piece of photo paper and then used the glass to see how I wanted it to line up.  Some of the blank space ended up being cut out too but would mostly be covered in the frame but it bothered me.  What is the photo shifted and someone saw white???  So again OCD girl stepped in and cut a tiny piece of the extra grass from the picture out and glued it on.  Problem solved.  But then it probably wouldn’t be a problem for most people. 

IMG_3424 IMG_3425 

I changed the black ribbon to a red to be more festive and then found it the perfect spot on my tree. 

IMG_8034

This year was so much easier and would have been cute even without the date on the front.  Now what are your go-to gift ideas for those who have everything???

Monday, November 5, 2012

Hooded Towels

My kids love hooded towels and what can I say… I love how cute they look in them.  The only problem is that Taylor is tall(not sure where she gets that from) and all the kid friendly hooded towels barely reach her knees.  I want to be able to snuggle my girls up in a fluffy towel after their bath.  When a friend shared a post about making a hooded towel out of a regular size bath towel and hand towel I thought she was genius.  Only I stressed about what color fabric to use for the stripe to coordinate with the girls bathroom and then decided to make life simple and leave it off.  So here is my version of the hooded towels:

Hooded Towel Tutorial

Supplies:
1 hand towel
1 large bath towel
Thread
Scissors

Directions:

Start with a regular size bath towel and matching hand towel.  I like to use the quick drying ones from Target.  Target often runs them on sale for $4/$3 each and they work well for the kids.  Also make sure you take a hand towel with you to buy thread rather than guessing.  I didn’t so so well with my choice of purple.

IMG_4087 IMG_4119 

Fold the towel with the right sides together and the short ends meet up.  Then stitch along the two outside edges.  I know you can’t see my stitching, but pretend you see straight stitches on the right and left side of the towel below.

 IMG_4092

Flip the towel right side out.  Take the corner of the hand towel that I am pointing to in the picture above and tuck it into the opposite corner.  Tuck the right corner inside the left corner.

 IMG_4093  IMG_4095 

Once you have tucked the one corner into the other, this is what your hand towel will look like.

IMG_4100

I learned after creating my first batch, that the hood can gain a funky shape after washing so I decided to add a line of stitching along the back seam almost to the ‘point’ of the hood.  It gets a little tricky to get up in the hood, but it gives the hood a little more structure. 

To cut down on thickness to sew through, I cut off the finished bottom edge of the towel.  Then fold it up in the back and stitch into place in order to conceal the raw edges of the fabric.

IMG_4104

Pin the center of the hood to the center of the bath towel (right-sides together)......stitch into place using a 1" - 1.5" seam allowance (yes, a large seam allowance).  If you need to use a larger seam allowance because you can still see some of the extra hand towel, feel free to do so.....no harm done.

 IMG_4105 IMG_4106 

Once you finish it will look like this on the inside. 

 IMG_4109

Then you ask your kid to model it for you and get silly poses like this.

 IMG_4110  IMG_4112  IMG_4114  

And then little sister begs you to hurry up and make her purple one.

IMG_4117 

This is the girls bathroom.  The hooded towels also work great because I decided to forgo traditional towel bars in their bathroom and added knobs for hooks instead. 

   IMG_4122    

This project takes less than 30 minutes, even with kid interruptions, to complete and your kids will love it!

Sunday, June 3, 2012

Bedroom Re-do

For about 6 months I have been gathering different elements and hoping to redecorate Taylor’s room.  Most of the room was the same from her nursery and we only got her a new comforter when she transitioned to a big girl bed 2 years ago.  She wanted to keep so much of the room the same at that time and I was busy planning Elizabeth’s nursery that I left it like she wanted.  It was time for the baby quilt and sea animals to come down and new elements brought in that reflected who she is and what she loves.  If it was up to her, the room would look like it threw up Disney and Hello Kitty, but I wanted to try and stay away from ‘logo’ products in order to help the room grow with her.  On one of my trips to Ikea for completely different items, I feel in love with this flower duvet cover and the matching curtains.  Taylor’s closet had folding doors on it that didn’t work well so when getting her nursery ready we took the doors off and put up a tension rods with curtains instead.  This has worked out so well with sneaking into her closet during the night to put away laundry or not having to worry about pinched fingers.  Plus the girls love hiding behind the curtains.  I wanted to be honest with how Taylor’s room looks on a daily basis and the clutter drives me insane.  Part of the re-do was also to clean out and offer her better usage of dresser drawers and baskets in her room/closet.  Here is her room before.  Sorry for the poor lighting, but I forgot to take pictures until 11 o’clock at night when I started the re-do.

IMG_2742

The clutter of doll/build a bear clothes drive me nuts!  She uses the top floor of her doll house to store cd’s and her video games from little sister.

IMG_2743

See baby quilt from over four years ago and massive amounts of stuffed animals on the bed?  Does anyone else have a kid who wants this many stuffed animals on the bed?  Where do you store them?  I know she plays with them, but they end up in a huge pile somewhere.  This is one problem I haven’t solved yet.

IMG_2745IMG_2747

First, I replaced the curtains with new ones from Ikea.  I heart Ikea and the fact that the curtains came with iron able hem tape so I didn’t even have to get out the sewing machine to make these the right length.  I made them a little longer so she could make it like a stage.  I have a hook inside the right side to pull the curtain back so she can get to her clothes.  This has worked really well for us.

IMG_2750

I also angled her doll house to give her a little more room along the window to play with her baby doll center.  She spends a lot of time at the center and it also gave her some baskets for doll clothes and accessories in between the doll house and baby center.

I changed her comforter to this sweet set from Ikea.  I took off most of the stuffed animals and she seems to utilize her bed for play more now.  I find her tucking her doll in and she even tries to make her bed more often now. IMG_2752

IMG_2755

I love all the colors and possibilities with this duvet cover.  I even found this floor pillow to match and thought it would be nice for reading books for playing her games. 

IMG_2756

The next big change was doing something about the blank wall above her bed.  I spent many hours looking at Etsy and all the beautiful paintings that some of the artists do on there.  I loved many of them but there were never quite right, or if they were they were WAY out of my budget.  So I decided that I would attempt to paint my own pictures for her wall.  Please know that I am in no way an artist but thought I could combine a Pottery Barn, Target, and Etsy to make my own.  Taylor loves butterflies, fairies, mermaids, and princesses so I tried to capture all those things.  Plus I feel in love with this wooden cross(unpainted) at Hobby Lobby and knew exactly what I wanted it to say.  I canvases at Michaels when they did a sale and let you use an additional 25% off coupon.  They sat around for 2 months until I decided what to paint.  Then I waited for the craft paint to go on sale for $0.25 each and had fun picking colors. 

IMG_2880

I learned that pencil does not paint over easily, glitter glue makes for great sparkly wings and mermaid tails, the wrong end of a paint brush makes the perfect size polka dot, and a heat tool that I use for embossing can help speed up the painting process when under a deadline.(or you are up until midnight and really want to go to bed)

IMG_2760IMG_2764IMG_2763

I did vinyl cut out with my Cricut to do the lettering on the castle and cross.  There was no way my OCDness would be happy with hand painted letters.  Plus I could peel the letters off if they didn’t look right.  I didn’t take the ‘h’ and ‘p’ being right by each other when sizing the letters for the cross.  I would probably make this a little smaller next time, but wanted it big enough to be a focus point.

IMG_2878IMG_2877

I didn’t really do much with the bookcase because it is serves more function than fashion and will need a good clean out soon to hand down books to little sister.  I cleaned off a few knick knacks from the dresser and clutter than had accumulated.(along with some dust bunnies)

IMG_2754

The last thing I did was hang a few butterflies from the ceiling for a sweet effect.  It was interesting to come up with locations that weren’t in the way of her monitor or the fan.  These were found in the spring section at Hobby Lobby at 40% making them $1.50 each.  A little clear fishing line and push pins made for simple hanging.  One hangs right over her bed so she can look up and see it.

IMG_2766IMG_2767

I should’ve videoed her seeing her room because it felt like Extreme Home Makeover and I was Ty telling them to ‘Move that bus’.  She loves it and loved figuring out all the new things.  Taylor has been trying really hard to keep it clean so that she can enjoy it more.  It turned out exactly how I wanted.  I know this was a long post and bless those of you who are still reading.  I did lots of searches for ideas for preschooler rooms and it was hard to find anything out there that you could easily do on a budget(love you Pottery Barn Kids, but my wallet doesn’t) or not overly Disney.  I hope you find this helpful! 

Now any tips on how to store those stuffed animals???


© 2011. All Rights Reserved. | Blog Design By Penny Lane Designs